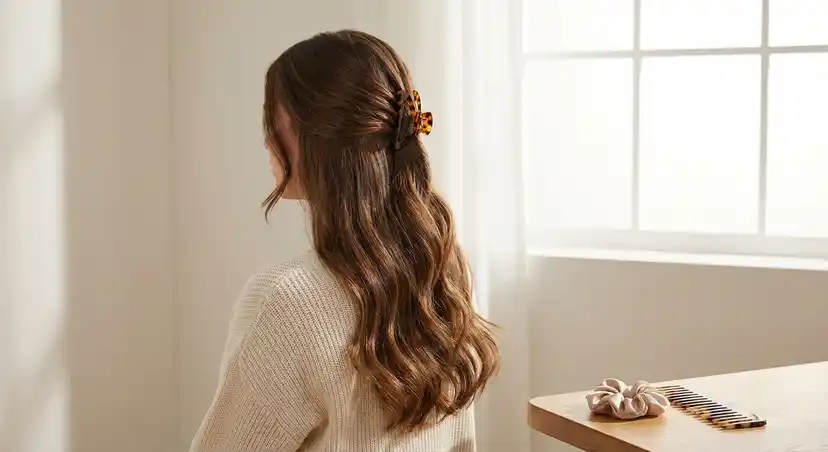
A claw clip is only as gentle as the technique you use with it.
You can buy the highest-quality acetate clip on the market, but if you're twisting too tight, clipping in the same spot daily, or yanking it out at the end of the day, you're still creating damage.
The good news? Proper technique isn't complicated. These five methods protect your hair while keeping styles secure all day. Master them, and your claw clip becomes one of the gentlest tools in your styling arsenal.
For the complete picture on hair protection, see our complete guide to protecting your hair from damage.
Why Technique Matters
Research consistently shows claw clips cause significantly less hair shaft damage than elastic hair ties. But that benefit only holds when clips are used properly.
What causes damage with claw clips:
- Twisting hair too tightly before clipping
- Wearing clips in the same position repeatedly
- Using clips that are too small for your hair volume
- Pulling clips out without opening them fully
- Positioning clips where they create scalp tension
What prevents damage:
- Loose twists with distributed tension
- Rotating clip positions daily
- Using appropriately sized clips
- Gentle removal with full clip opening
- Comfortable positioning that doesn't pull
Dermatologists note that claw clips reduce the risk of traction alopecia—a type of hair loss caused by prolonged tension—because they don't tightly constrict hair the way elastic bands do. But technique determines whether you get those benefits.
The 5 Gentle Techniques
Technique 1: The Loose Twist Method
This is your default technique for everyday wear—secure without strain.
Step by step:
-
Gather hair loosely: Don't pull tight against your scalp. Let there be slack at the roots.
-
Twist gently: Create a loose spiral, not a tight coil. Think "casually wound" rather than "wound tight."
-
Stop before it's tight: When you feel resistance starting, stop twisting. That's the sweet spot.
-
Position the clip: Hold the twist against your head and open the clip with your other hand.
-
Close gently: Let the clip close on the twist—don't force it to grip more hair than it wants.
-
Adjust if needed: If it feels like it's pulling, open the clip and try with less twist or a different angle.
The test: If you can feel tension at your scalp, you've gone too tight. A proper loose twist feels secure but comfortable, like you could forget you're wearing it.
Best for: Everyday wear, extended wear, damaged or fragile hair
Technique 2: The Half-Twist Fold
For when you want a fuller look with less rotation stress on your strands.
Step by step:
-
Gather hair at desired height: Crown, mid-head, or low at nape.
-
Start a twist, then stop: Do only 1-2 rotations—enough to gather, not enough to spiral.
-
Fold the length upward: Instead of continuing to twist, fold the hanging length back toward your scalp.
-
Secure with clip: Position the clip so it catches both the fold and the base.
-
Tuck any loose ends: If strands escape, gently tuck them into the clip.
Why it's gentler: Full twists rotate every strand around a central axis, creating stress. The fold method reduces rotational stress while still achieving an updo.
Best for: Medium to long hair, half-up styles, achieving volume without tension
Technique 3: The Section-and-Clip Method
Using multiple smaller clips instead of one large one distributes weight and tension.
Step by step:
-
Section your hair: Divide into 2-3 sections (top and bottom, or left, center, right).
-
Clip each section separately: Use smaller clips for each section rather than one big clip for everything.
-
Start from the bottom: Secure lower sections first, then work upward.
-
Keep each section loose: Apply the loose twist principle to each individual section.
Why it's gentler: Weight distribution is key. One clip holding everything concentrates stress; multiple clips spread it out.
Best for: Thick hair, heavy hair, very long hair, extended wear
Technique 4: The Gravity-Assisted Position
Let gravity help rather than fighting it.
Step by step:
-
Clip at or below ear level: Lower positions put less pulling stress on follicles.
-
Let hair hang naturally first: Don't gather against gravity—gather with it.
-
Minimal twist: At low positions, you often need less twist for security.
-
Choose a position that doesn't pull: Before fully securing, check that nothing feels strained.
Why it's gentler: High ponytails and top-of-head clips fight gravity all day, creating constant tension. Lower positions work with gravity instead.
Best for: All-day wear, anyone prone to tension headaches, traction alopecia prevention
Technique 5: The Comfort Check Method
A systematic approach to ensuring every style is damage-free.
Step by step:
-
Complete your initial clip: Use any style you prefer.
-
The tension test: Close your eyes and notice any pulling sensation. Be honest.
-
The movement test: Move your head in all directions. Does anything shift uncomfortably?
-
The time projection: Imagine wearing this for 8 hours. Will it still be comfortable?
-
Adjust until everything passes: If any test fails, reposition until it passes all three.
The principle: Your body gives feedback—listen to it. Any style that feels uncomfortable now will cause problems later.
Best for: Learning your personal limits, training yourself to notice tension before it causes damage
The Rotation Rule: Non-Negotiable
Even with perfect technique, wearing clips in the same position daily creates localized damage.
Why rotation matters:
- Concentrated stress weakens specific areas
- The same strands bear the load repeatedly
- Breakage appears at the "clip line"
- Early stages of traction alopecia begin here
Weekly rotation schedule:
| Day | Suggested Position |
|---|---|
| Monday | High at crown |
| Tuesday | Low at nape |
| Wednesday | Right side |
| Thursday | Mid-height, center |
| Friday | Left side |
| Saturday | Different style entirely |
| Sunday | Hair down (rest day) |
You don't need to follow this exactly—just make sure you're not putting clips in the same spot two days running.
For more style variety, see how to style a claw clip: 10 easy hairstyles.
Removal: The Forgotten Step
How you take clips out matters as much as how you put them in.
The Right Way
-
Find the release point: Locate where you grip to open the clip.
-
Squeeze fully open: Open the clip completely—don't just loosen slightly.
-
Lift straight away: With the clip fully open, lift it directly off your head.
-
Detangle if needed: If any strands caught, gently untangle before pulling away.
The Wrong Way
- Yanking without opening: Creates friction and can pull out strands
- Partial opening: Teeth dragging through hair causes breakage
- Twisting while removing: Adds rotational stress
- Rushing: Fast removal = careless damage
The test: If you hear snapping sounds or feel hair pulling, you're removing incorrectly.
Sizing for Safety
Using the wrong size clip forces poor technique.
Too Small
If your clip is too small:
- You'll twist tighter trying to fit hair
- The spring strains to hold, creating pressure points
- Hair escapes, tempting you to constantly adjust
- Each adjustment creates more stress
Too Large
If your clip is too large:
- It may feel loose and insecure (but this is actually fine for hair health)
- You might not achieve the aesthetic you want
When in doubt, size up. A slightly loose clip with gentle technique beats a tight grip every time.
For sizing guidance, see claw clip size guide.
Special Considerations by Hair Type
Fine Hair
- Use lighter clips that don't overpower strands
- Less twist is needed—fine hair holds with minimal gathering
- Matte textures grip better than smooth, preventing the need to twist tighter
- See best claw clips for fine hair
Thick Hair
- Size up—thick hair needs room
- Consider the section-and-clip method
- Strong springs are important (weak springs lead to adjustment stress)
- See best claw clips for thick hair
Curly Hair
- Never brush curly hair just to clip it (creates frizz and damage)
- Gather curls gently without destroying curl pattern
- Wider-spaced teeth accommodate curl volume better
- See best claw clips for curly hair
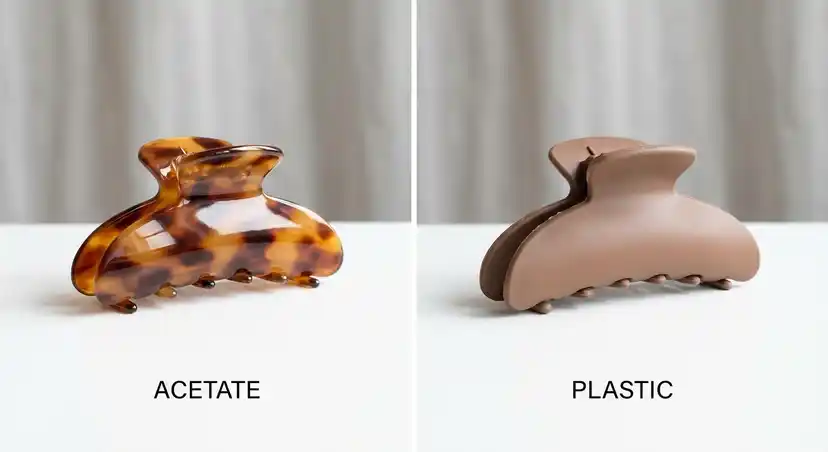
Damaged Hair
- Prioritize the loosest possible hold
- Polished acetate or smooth surfaces only
- More frequent breaks from styling
- See best claw clips for damaged hair
Long Hair
- Support length before clipping (don't let weight pull on clip point)
- The fold technique works especially well
- Buns distribute weight better than ponytails
- See best claw clips for long hair
Common Mistakes and Fixes
| Mistake | Why It's Damaging | The Fix |
|---|---|---|
| Twisting until tight | Concentrates stress, strains follicles | Stop at first resistance |
| Same position daily | Creates localized breakage | Rotate positions every day |
| Yanking clips out | Friction and pulling damage | Open fully before removing |
| Using too-small clips | Forces tighter twisting | Size up |
| Clipping wet hair | Wet hair is weaker, stretches | Wait until mostly dry |
| Wearing too long | Extended stress accumulates | Take breaks, especially at home |
| Ignoring discomfort | Pain signals damage happening | Reposition immediately |
When to Take Hair Down
Your hair needs breaks from any styling. Times to let it down:
- At home: Unless you're cooking or cleaning, let it loose
- After work: Give your scalp relief during evening hours
- When you feel tension: Any discomfort means it's time
- For at least part of weekends: Regular rest periods matter
The more damaged or fragile your hair, the more break time it needs.
Building the Habit
Gentle technique isn't difficult, but it takes conscious practice until it becomes automatic.
Week 1: Focus on tension awareness. Every time you clip your hair, check: does it feel tight? Adjust until it doesn't.
Week 2: Focus on rotation. Set a reminder to vary your clip position. Notice how different placements feel.
Week 3: Focus on removal. Every time you take a clip out, make it slow and deliberate. Open fully, lift gently.
Week 4: Put it together. By now, gentle technique should feel natural.
Signs You're Doing It Right
You know your technique is protecting your hair when:
- You forget you're wearing a clip (no tension awareness)
- No headaches or scalp soreness
- Clip comes out easily with no snagging
- No visible breakage at common clip points
- Hair looks the same before and after (no creasing, no damage)
Signs You Need to Adjust
Time to reassess your technique if:
- You notice breakage where you typically clip
- Scalp feels sore after wearing clips
- You need to adjust clips constantly (may indicate wrong size)
- Removing clips feels difficult or pulls hair
- You're developing thinning at the hairline
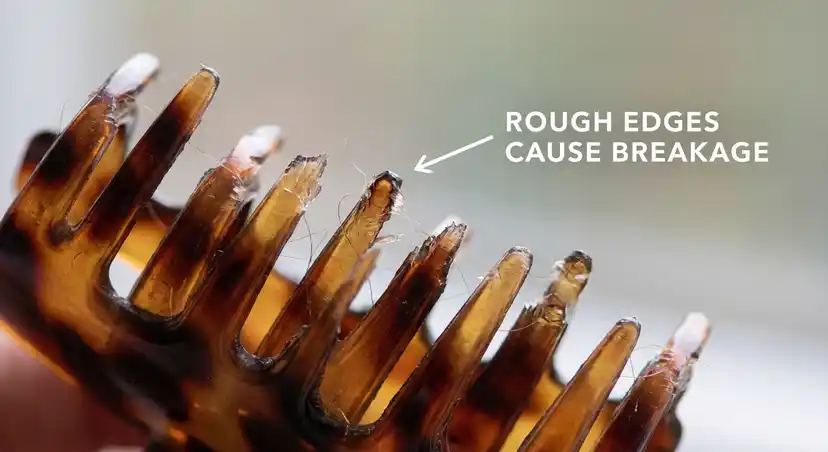
For troubleshooting, see why your hair clip might be breaking your hair and safe vs. damaging hair clips: how to tell.
FAQ
How tight should a claw clip be?
Secure but not strained. You should not feel pulling at your scalp, and removing the clip should require no effort beyond squeezing it open. If your style feels "tight," it's too tight.
Can I wear a claw clip all day?
Yes, with gentle technique. Many people wear clips for 8+ hours comfortably. The keys are proper sizing, loose tension, and removing the clip if you notice any discomfort.
Should I clip wet hair?
It's better to wait until hair is mostly dry. Wet hair is in a weakened state and stretches more easily, making it more vulnerable to damage from any styling. If you must clip wet hair, be extra gentle.
How often should I rotate clip positions?
Every day, ideally. At minimum, don't wear a clip in the same position two days in a row. Weekly rest days where hair stays completely down also help.
Why does my clip fall out when I use gentle techniques?
If gentle techniques don't hold, you may need: a different clip size (usually larger), a clip with a stronger spring, a different style (some styles hold better than others), or added texture (texturizing spray helps clips grip).
See why does my claw clip keep falling out for solutions.
Is it bad to twist my hair at all?
No—gentle twisting is fine. The problem is excessive twisting that creates tight coils. A loose twist gathers hair without creating the rotational stress that causes damage.
Related Articles
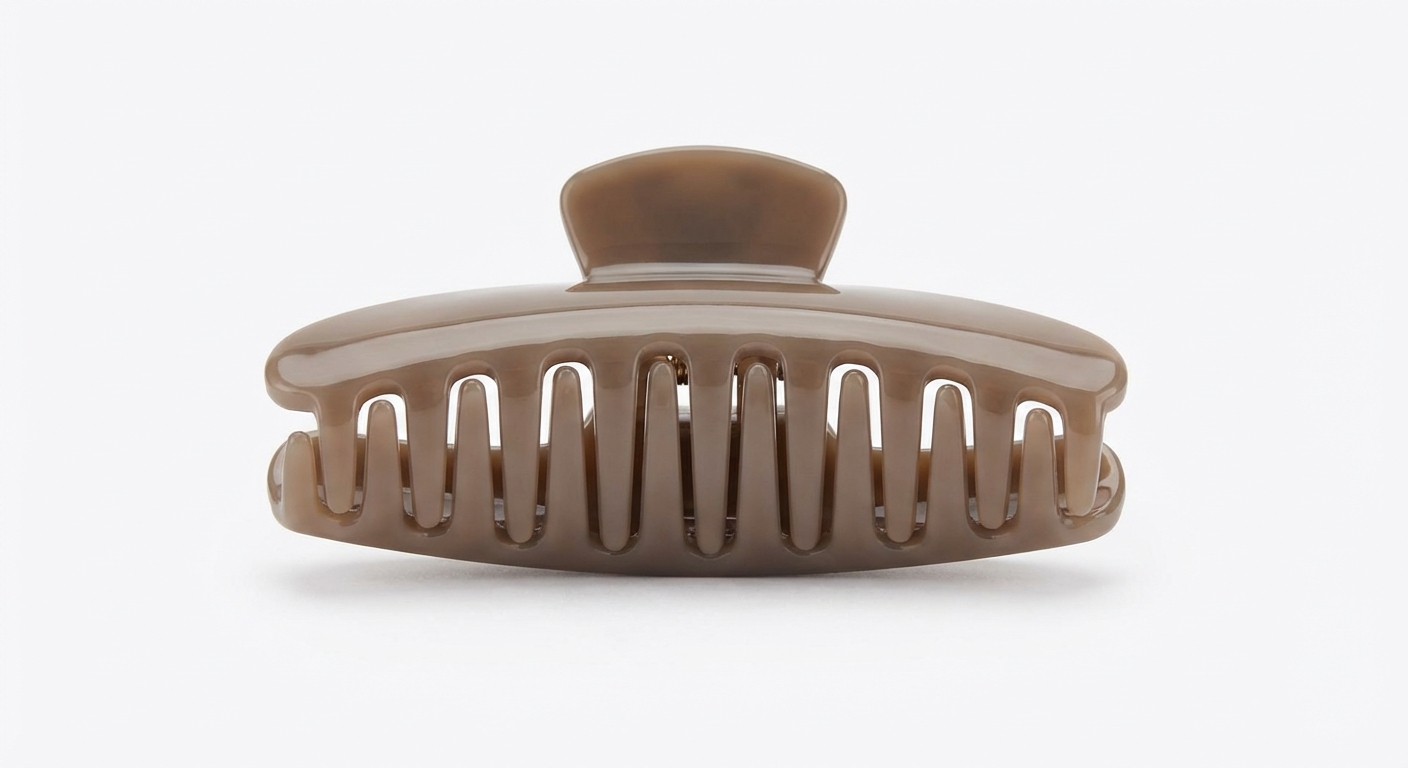
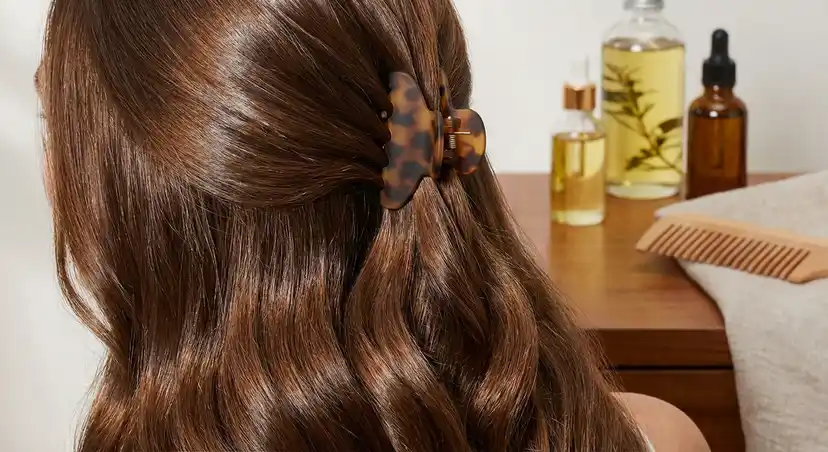
France Luxe Jaw Clip with Double Row Teeth
Premium acetate is smooth and won't catch hair. Double row teeth distribute grip to prevent concentrated pressure.
“The smooth acetate and distributed grip make this so gentle on my hair....”
We tested dozens of claw clips to find the very best options. Below you'll find our complete ranking, with detailed reviews and real customer feedback for each pick.
The Complete Ranking
France Luxe Jaw Clip with Double Row Teeth
“The smooth acetate and distributed grip make this so gentle ...” — Verified Buyer
Premium acetate is smooth and won't catch hair. Double row teeth distribute grip to prevent concentrated pressure. The gentle construction makes proper technique even more effective.
“The smooth acetate and distributed grip make this so gentle on my hair.”
— Verified Buyer
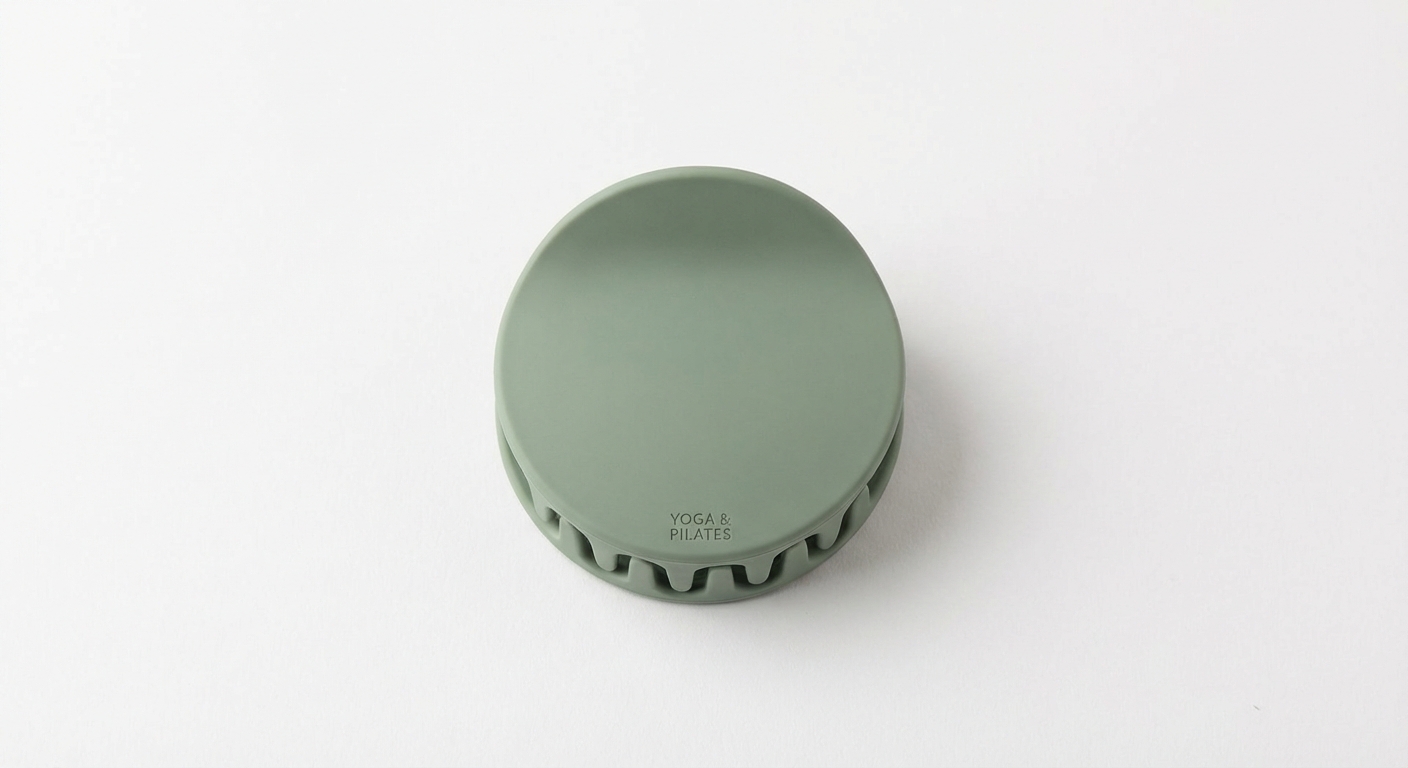
TELETIES Medium Flat Round Clip
“Perfect for the low-tension styling techniques. My hair than...” — Verified Buyer
Designed to minimize tension with flat-back construction and bendable teeth. Follows the gentle techniques in this guide naturally. No pressure points means no damage zones.
“Perfect for the low-tension styling techniques. My hair thanks me.”
— Verified Buyer
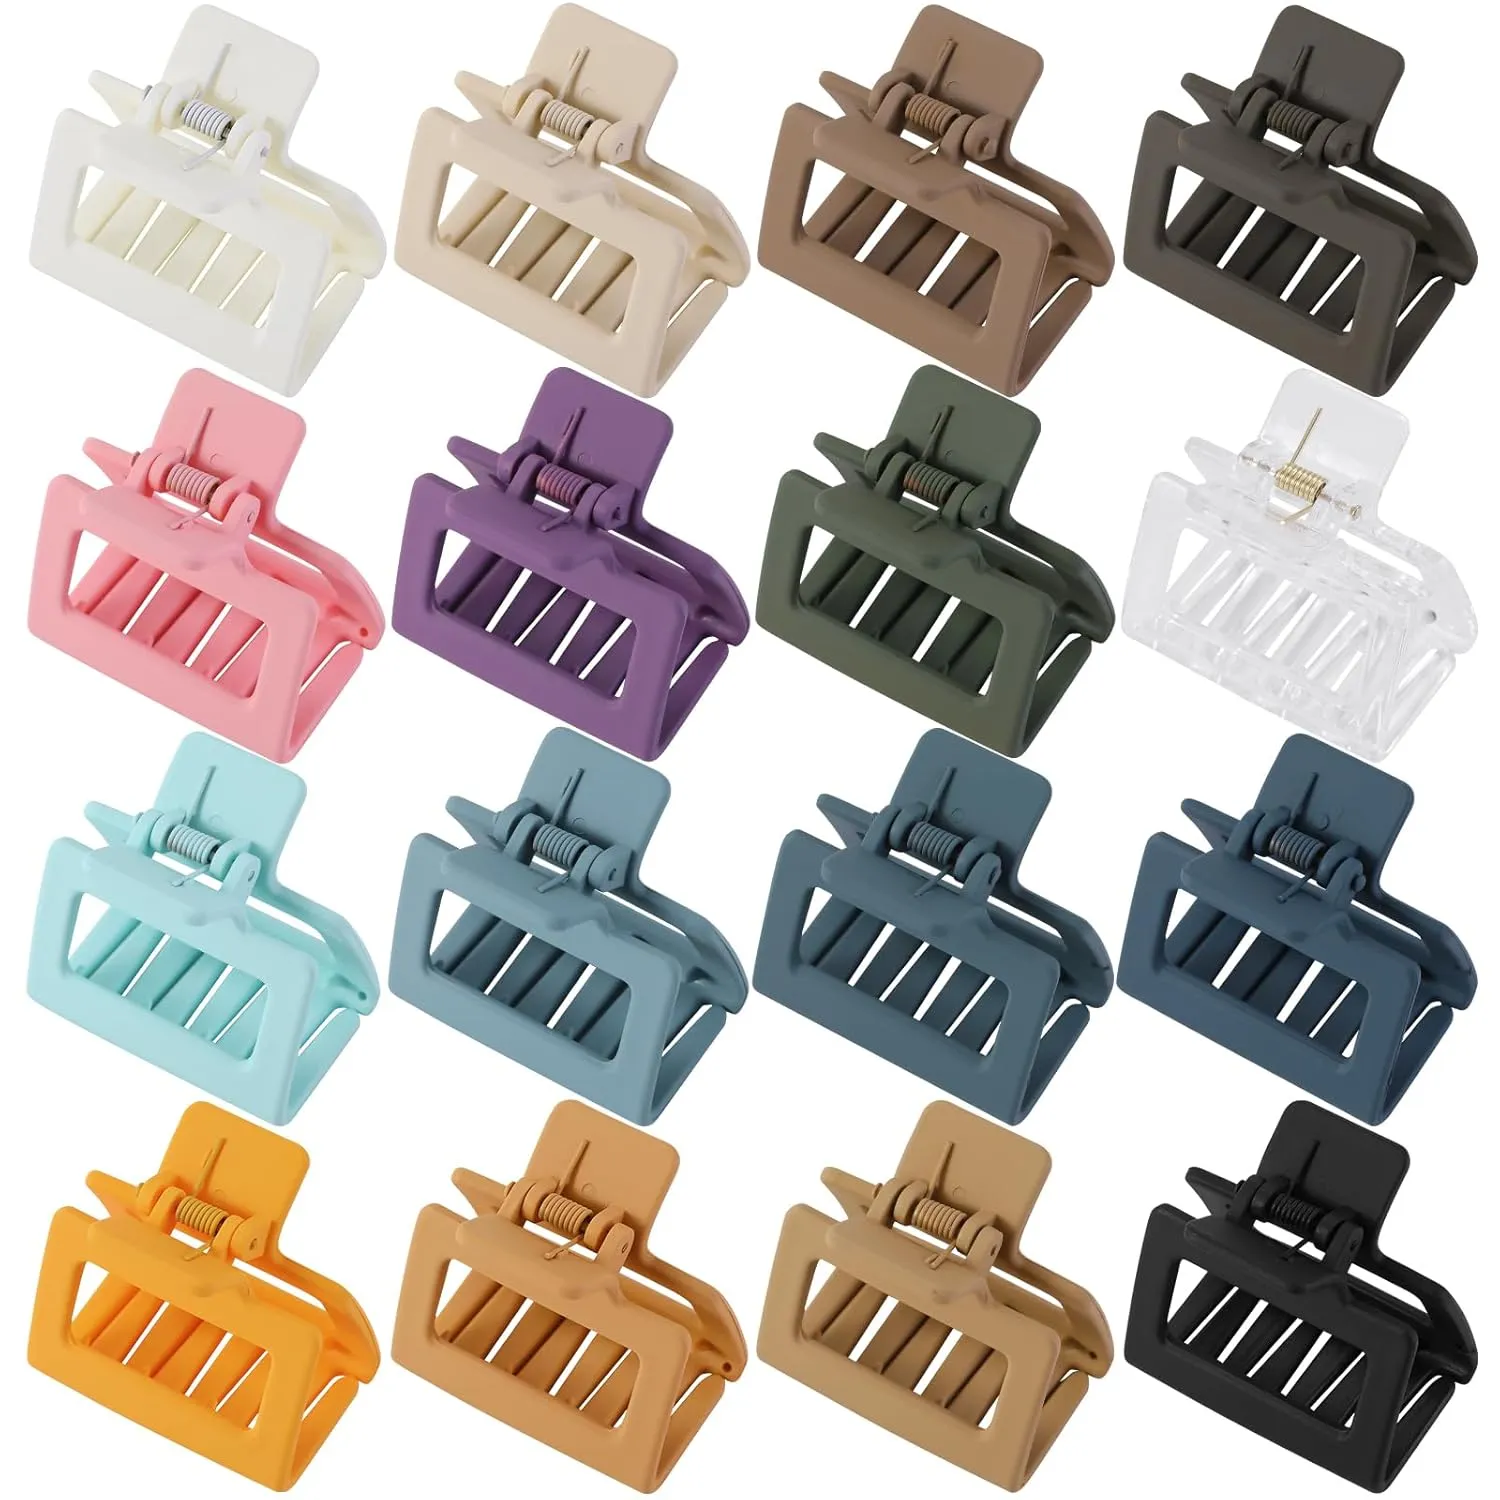
Rectangle Matte Claw Clips (16 Pack)
“The matte grip holds without tugging. My hair doesn't get da...” — Verified Buyer
Matte finish provides grip without pulling. Rectangle shape distributes pressure evenly. Great for practicing the gentle techniques covered in this guide.
“The matte grip holds without tugging. My hair doesn't get damaged anymore.”
— Verified Buyer
The smooth acetate and distributed grip make this so gentle on my hair.
Quick Comparison
A side-by-side look at our top picks
Frequently Asked Questions
Technique matters as much as the tool
Loose is the new secure
Rotation is non-negotiable

Donna Miller
Enjoyed This Guide?
Get more hair tips and product recommendations delivered weekly.