The French twist is the most elegant claw clip style, transforming any outfit into something polished and sophisticated. While it looks complicated, a claw clip version is actually straightforward once you understand the technique.
This tutorial breaks the French twist into simple steps, with tips for every hair type and common mistakes to avoid.
For more claw clip styles, see our 10 easy hairstyles guide or our complete claw clip guide.
What You'll Need
- Claw clip: Medium to large, depending on hair thickness
- Brush or comb: To smooth hair before styling
- Mirror: Ideally one that lets you see the back of your head
- Optional: Light hairspray, bobby pins for extra security
Choosing the Right Clip
| Hair Type | Recommended Clip Size |
|---|---|
| Fine, short to medium | Medium (2.5-3.5") |
| Average thickness, medium length | Medium to large (3-4") |
| Thick or long | Large (3.5-4.5") |
| Very thick or very long | Large to jumbo (4-5") |
The clip should close with slight resistance around your twisted hair. Too small and it won't hold; too big and it'll slide.
For clip recommendations, see our size guide.
The Basic French Twist: Step by Step
Step 1: Prep Your Hair
Start with dry, brushed hair. Freshly washed hair can be slippery; second-day hair often holds better.
- Brush thoroughly to remove tangles
- If hair is very smooth, apply texturizing spray
- Create a center or side part (your preference)
Time: 30 seconds
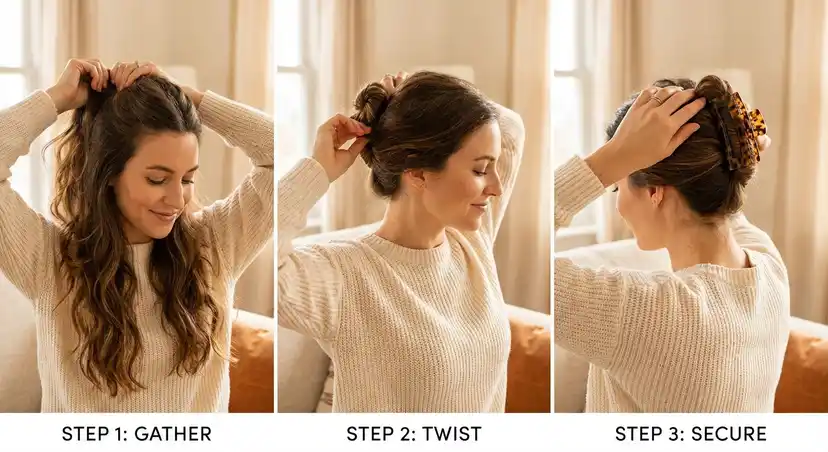
Step 2: Gather at the Nape
- Tilt your head slightly back
- Gather all hair at the nape of your neck, as if making a low ponytail
- Hold with your non-dominant hand
- Make sure you've gathered ALL hair, including pieces near your temples
Common mistake: Missing hair at the sides. Run your fingers along your hairline to catch everything.
Time: 10 seconds
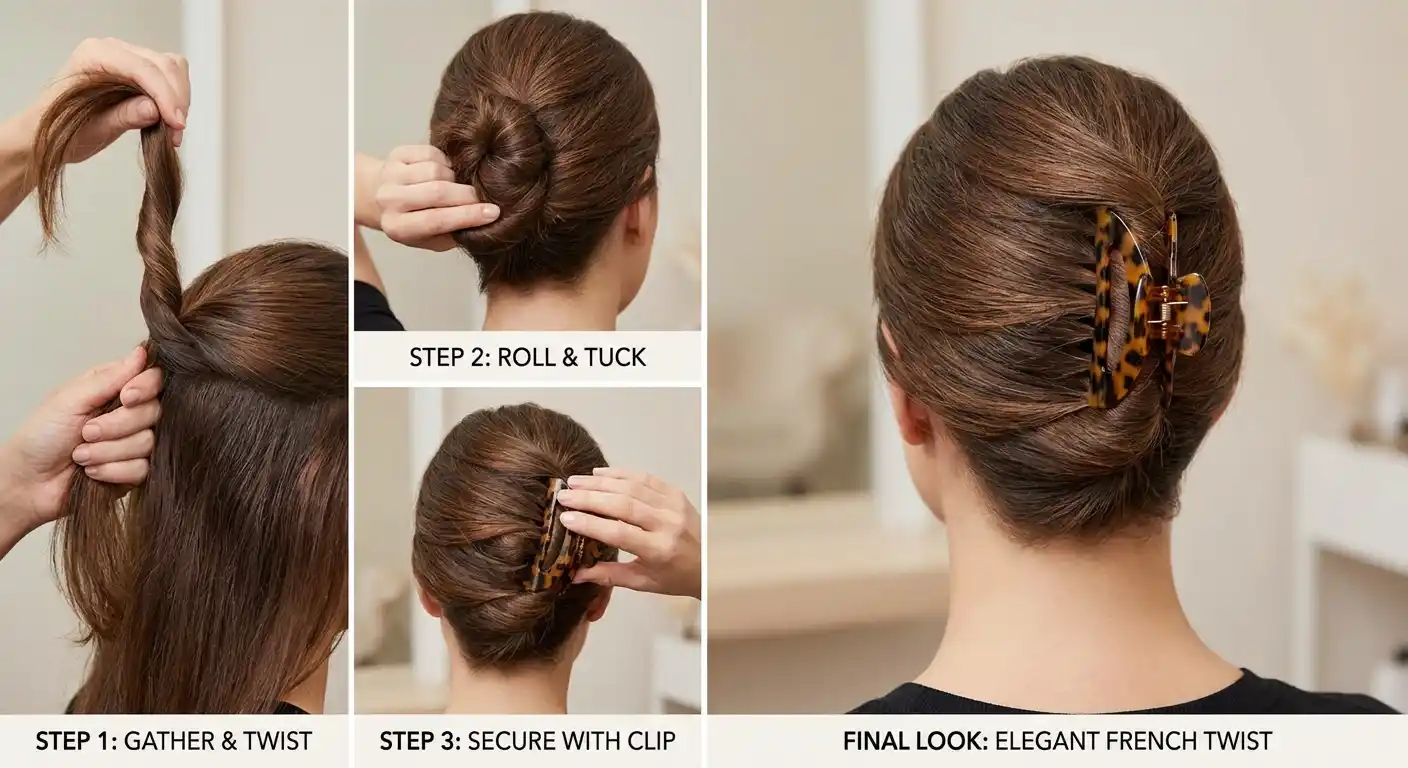
Step 3: Begin the Twist
- With your dominant hand, begin twisting the gathered hair clockwise (if right-handed) or counter-clockwise (if left-handed)
- Keep twisting until the hair forms a rope
- As you twist, the rope should start to flip upward naturally
Key point: Twist firmly but not aggressively. You want tension without strain.
Time: 10 seconds
Step 4: Roll Upward
This is the crucial step that makes a French twist different from a regular twist.
- Continue twisting while simultaneously rolling the twist UP your head
- Keep the twist FLAT against your skull (this is important)
- The twist should run vertically from nape to crown
- As you roll, the twist naturally wants to coil, let it
Key point: Press the twist against your head as you roll. Don't let it stick out.
Time: 15 seconds
Step 5: Secure the Ends
You have two options for the ends:
Option A: Tucked Ends (most formal)
- When you reach the crown, tuck the ends underneath the twist
- This creates a completely smooth, closed look
- The ends are invisible
Option B: Fanned Ends (casual elegant)
- When you reach the crown, leave the ends sticking up
- Fan them out for a more relaxed silhouette
- The ends add visual interest at the crown
Time: 5 seconds
Step 6: Insert the Claw Clip
- Open your clip with your free hand (you're still holding the twist with the other)
- Position the clip vertically along the twist
- The clip should grip both the twist and the hair underneath it (at your scalp)
- Close the clip firmly
- Gently release and check that it holds
Key point: The clip should grab hair from your scalp, not just the twisted portion. This anchors everything.
Time: 10 seconds
Step 7: Adjust and Finish
- Look in the mirror (front and back if possible)
- Gently pull at the front to create soft volume
- Smooth any flyaways with your palm or a light mist of hairspray
- Adjust the clip position if the twist feels uneven
Time: 15 seconds
Total time: About 1.5-2 minutes (faster with practice)
Visual Summary
| Step | Action | Key Point |
|---|---|---|
| 1 | Prep hair | Brush smooth, add texture if needed |
| 2 | Gather at nape | Get ALL hair including temple pieces |
| 3 | Begin twist | Twist firmly until rope forms |
| 4 | Roll upward | Keep flat against head |
| 5 | Secure ends | Tuck under or fan out |
| 6 | Insert clip | Grip twist AND scalp hair |
| 7 | Adjust | Pull for volume, smooth flyaways |
Variations
The Relaxed French Twist
For a softer, more casual look:
- Follow basic steps but twist loosely
- Don't smooth hair before starting
- Leave face-framing pieces out
- Fan the ends rather than tucking
- Allow some wisps to escape
The Side French Twist
For an asymmetrical look:
- Gather hair at one side of your neck (behind one ear)
- Twist and roll UP and toward the opposite side
- The twist ends behind the opposite ear
- Secure with clip positioned at an angle
The Half-Up French Twist
For a semi-formal option:
- Part hair horizontally from ear to ear
- Use only the top section for the twist
- Leave bottom half down
- Smaller clip works for this version
The Double Twist
For very thick or heavy hair:
- Divide hair horizontally into two sections
- Create a French twist with the bottom section first
- Create a second twist above it with the top section
- Use two clips, or one large clip securing both
Troubleshooting Common Problems
"My twist sticks out instead of lying flat"
Cause: You're twisting outward instead of rolling upward against your head.
Fix: Focus on pressing the twist INTO your head as you roll up. Imagine rolling a towel up against a wall.
"The clip keeps falling out"
Causes and fixes:
- Clip too small → Size up
- Clip only gripping twist, not scalp hair → Reposition to grab both
- Hair too slippery → Add texturizing product
- Twist too loose → Twist more firmly before clipping
"My twist is uneven/lopsided"
Cause: Hair gathered unevenly or twist rolled at an angle.
Fix: Start over (it's only 2 minutes). Make sure you gather hair evenly at the center back, and roll straight up rather than at an angle.
"I can't get the ends tucked"
Cause: This is tricky with shorter or layered hair.
Fix:
- Try the "fanned ends" variation instead
- Use a bobby pin to secure ends before clipping
- If hair is too short to tuck, accept that fanned ends are your look
"The twist unravels throughout the day"
Causes and fixes:
- Not enough initial twist → Twist more before rolling
- Hair too smooth → Add texture product
- Clip not gripping scalp → Reposition
- Clip too weak → Get a clip with stronger spring
Tips for Different Hair Types
Fine Hair
- Apply volumizing or texturizing product first
- Don't twist too tight (can look stringy)
- Use a clip with close-set teeth for better grip
- Consider the half-up French twist if full twist won't hold
Thick Hair
- Twist very firmly (thick hair can handle it)
- Use a large or jumbo clip
- Consider the double twist technique
- Bobby pins underneath add security for all-day events
Curly Hair
- Don't brush curls smooth (will create frizz)
- Finger-comb gently instead
- Twist more loosely to preserve curl pattern
- The relaxed French twist variation works well
- Expect and embrace some escaped curls
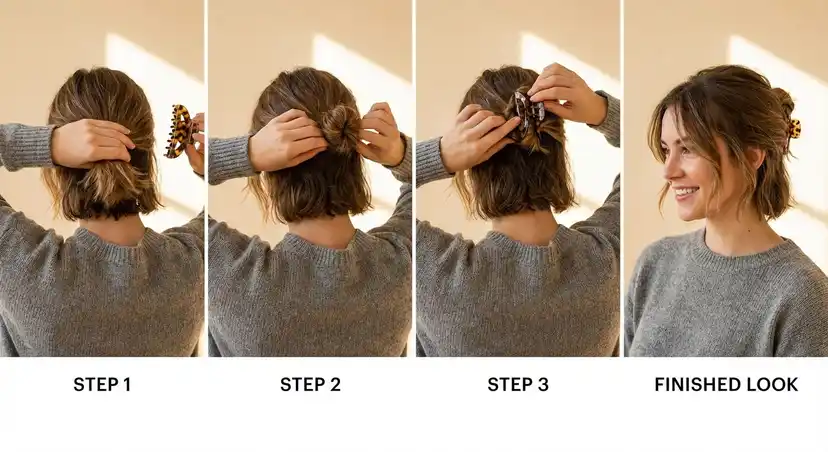
Layered Hair
- Shorter layers may escape; that's okay
- Use the fanned ends variation (tucking is hard with layers)
- Smooth layers with light hairspray after securing
- Mini bobby pins can catch escaping pieces
Very Long Hair
- You have more to work with, which can be both easier and harder
- Twist may be very thick; use a jumbo clip
- Double twist technique distributes weight
- Tucked ends work beautifully with long hair
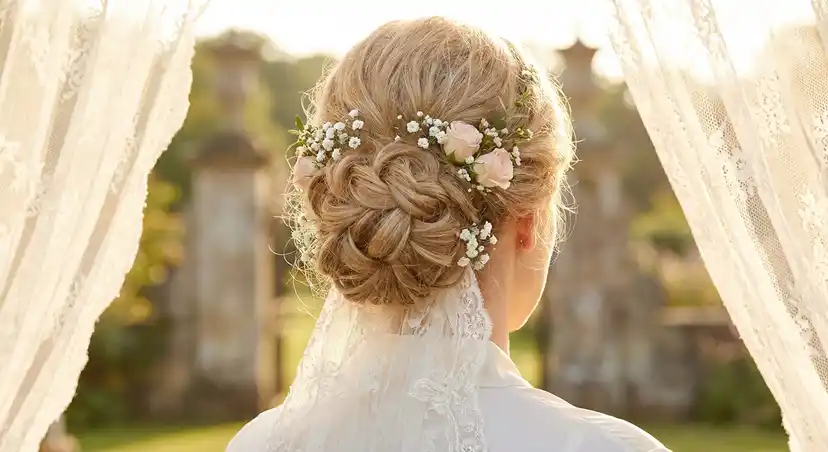
French Twist for Special Occasions
Wedding/Formal Events
Upgrades for maximum elegance:
- Use a decorative or jeweled clip
- Add bobby pins underneath for security (hidden)
- Apply smoothing serum before styling
- Mist with strong-hold hairspray when done
- Practice the day before
Date Night
Balancing polished and effortless:
- The relaxed French twist variation
- Leave face-framing tendrils out
- Use a statement clip in tortoiseshell or gold
- Fan the ends for softness
Work Presentations
Professional and secure:
- The basic formal French twist
- Neutral-colored clip
- Tuck the ends for a clean silhouette
- Ensure no flyaways with light hairspray
For more formal hairstyle ideas, see our wedding and formal hairstyles guide.
Adding Extra Security
For events where failure is not an option:
Bobby Pin Anchors
- Complete the French twist
- Before inserting the claw clip, place 2-3 bobby pins along the twist
- Insert pins in an X pattern for best hold
- Add the claw clip over the bobby pins
The Elastic Base
- Create a low ponytail with a small, clear elastic
- Create the French twist with the ponytail
- The elastic provides a base anchor
- Clip as usual
Hairspray Lock
- Complete and clip the French twist
- Mist with strong-hold hairspray from 8-10 inches away
- Gently press any flyaways
- Let dry before touching
Practice Exercise
If you're new to French twists, try this practice routine:
Day 1: Just practice gathering and twisting. Don't worry about the roll-up.
Day 2: Practice the upward roll. Focus on keeping it flat against your head.
Day 3: Add the clip. Get comfortable with positioning.
Day 4: Full French twist. Time yourself.
Day 5: Aim for under 2 minutes. Refine your technique.
By day 5, the French twist will feel natural.
FAQs
How long should my hair be for a French twist?
Minimum shoulder-length. The technique works better with more length. Chin-length and shorter won't work for a traditional French twist.
Can I do this on curly hair without straightening?
Yes. The twist will look different (softer, more textured) but it works. Don't brush out your curls; finger-comb gently instead.
What if I only have a small clip?
A small clip can work for fine or thin hair, but most French twists need at least a medium clip. If your clip is too small, the half-up French twist is an alternative.
How do I make it last all day?
Right-size clip + firm twist + hairspray + occasional check/adjustment in the restroom. For formal events, add bobby pins for insurance.
Is this style appropriate for work?
Absolutely. The French twist is one of the most professional claw clip styles. Use a neutral clip for conservative settings.
My hair is very thick and the twist is huge. Is that normal?
Yes. Thick hair makes a thick twist. Embrace it or try the double twist technique to distribute the volume into two smaller twists.
The Bottom Line
The French twist is the most elegant claw clip style, worth the initial learning curve. Key points:
- Twist firmly before rolling
- Keep flat against your head
- Roll upward, not outward
- Clip grips both twist and scalp hair
- Practice 4-5 times before important events
Once mastered, you'll have a 2-minute style that looks like you spent 20 minutes.
For more styles, explore our professional work hairstyles, wedding styles, or our complete claw clip guide.
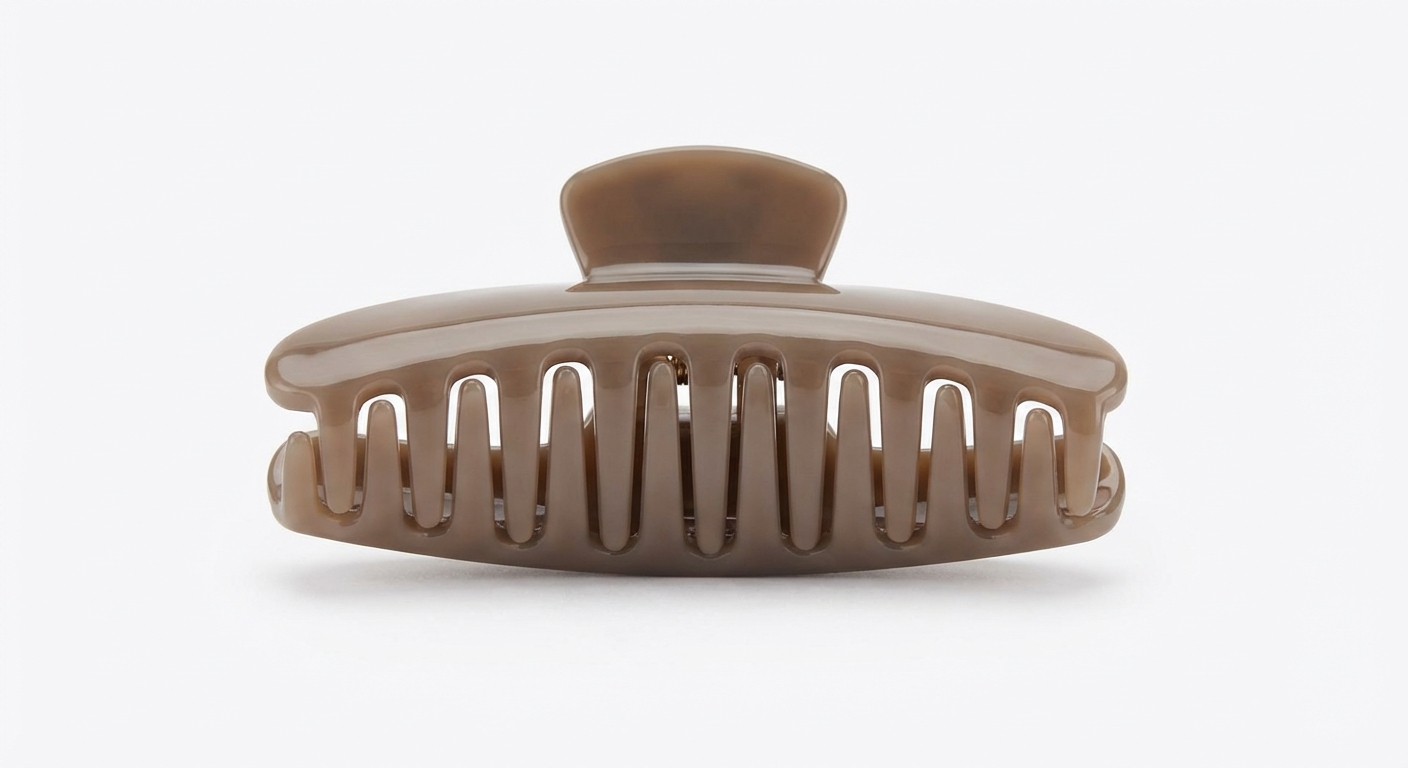
France Luxe Jaw Clip with Double Row Teeth
Premium acetate construction looks sophisticated for French twist styles. The double row teeth grip securely for all-day hold.
“This clip makes my French twist look polished and professional. Worth the investment....”
We tested dozens of claw clips to find the very best options. Below you'll find our complete ranking, with detailed reviews and real customer feedback for each pick.
The Complete Ranking
France Luxe Jaw Clip with Double Row Teeth
“This clip makes my French twist look polished and profession...” — Verified Buyer
Premium acetate construction looks sophisticated for French twist styles. The double row teeth grip securely for all-day hold. Elegant tortoiseshell pattern elevates any look.
“This clip makes my French twist look polished and professional. Worth the investment.”
— Verified Buyer
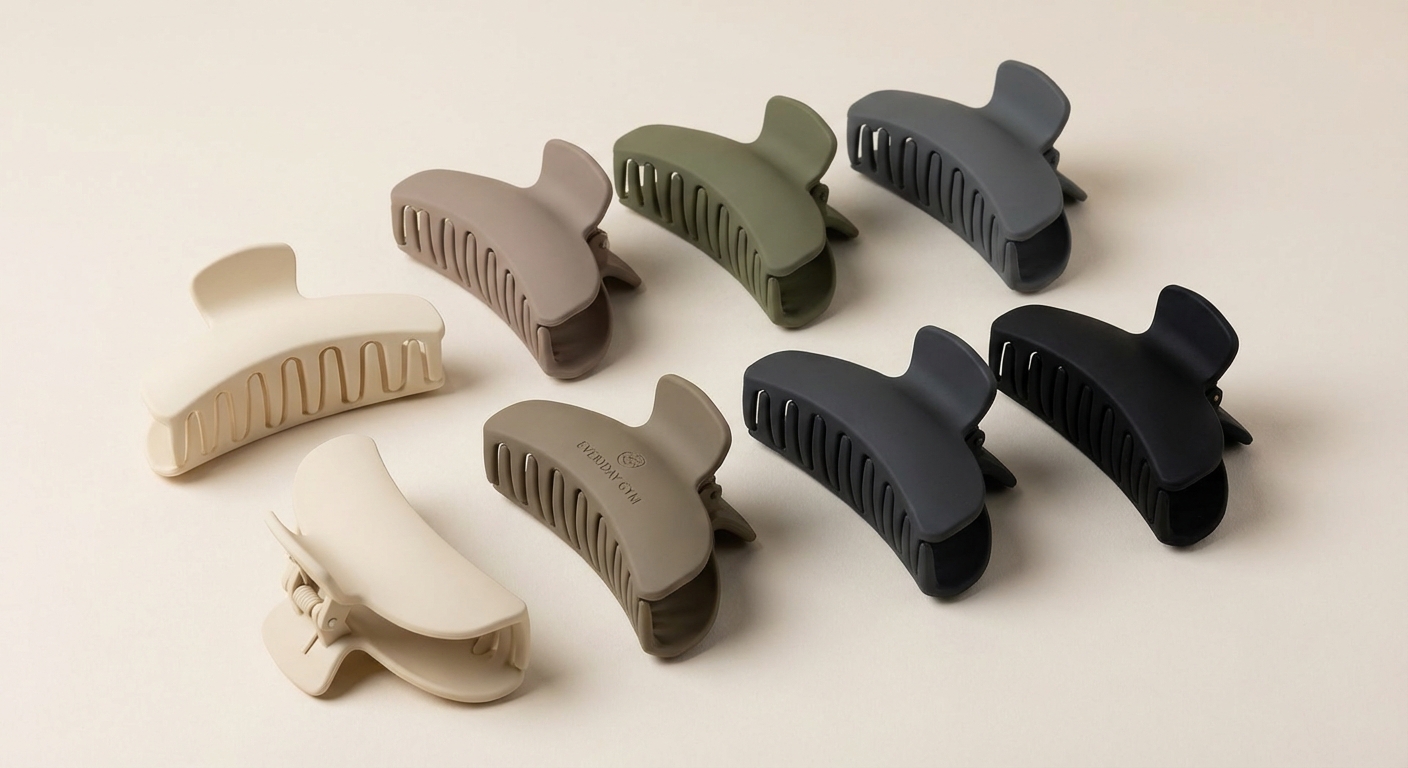
TOCESS 8 Pack Big Hair Claw Clips
“Great for learning the French twist. Strong hold and good va...” — Verified Buyer
Perfect for practicing French twists. The 4.33-inch size handles medium to thick hair, and the 8-pack gives you plenty of clips for learning without worrying about damage.
“Great for learning the French twist. Strong hold and good value.”
— Verified Buyer
This clip makes my French twist look polished and professional. Worth the investment.
Quick Comparison
A side-by-side look at our top picks
Frequently Asked Questions
The Classic Simplified
The 'Flat' Secret
Practice Makes Perfect

Donna Miller
Enjoyed This Guide?
Get more hair tips and product recommendations delivered weekly.